Introduction
What is this all about?
This tool will transform any given text in HamNoSys notations, placed in the proper field to an xml script/ file for the avatar animation. The user can translate from a simple word up to a phrase containing, for the time being, four words. Non manual characters can be used as well. The xml file will be saved, if this is desired from the user, to the server and will be available to anyone.
Describing the user interface
When the user first enters the right URL address, will see the user interface as seen on the image below:
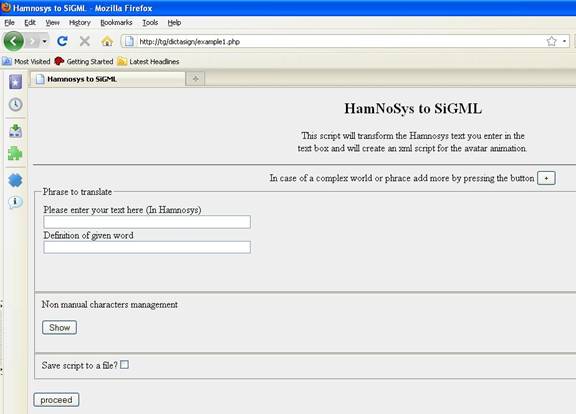
Figure 1: User interface
From the top to the bottom, following can be seen: In the middle of the page, just below the description a button with the printed value '+' on it is to see. By pressing this button, another pair of textboxes will appear below in the section 'Phrase to translate'. There is a limit of 4 pairs of text boxes. By pressing another time, a message will appear to the user informing him about the limit. See image below:

Figure 2: Word limit
Below the section 'Phrase to translate' there is another section entitled 'Manage non manual characters' and a button within. The button has the value 'Show' printed on it.
By pressing the button, a new section will appear below, entitled as 'Non manual characters', which contains a button entitled as 'Check' and nine checkboxes, which allow the user to display ways to include information for the translation of the HamNoSys word or phrase also with non manual characters. (See figure 3 below)
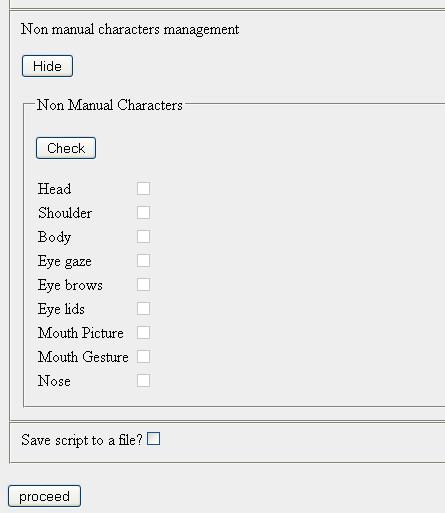
Figure 3: Non manual characters management
At first the checkboxes are disabled. The buttons can be checked for displaying and hiding the extra information for the translation, after pressing the 'Check' button.
By pressing the mentioned button, a full range of non manual characters entries, will be visible to the user in form of lists. These entries can be used by the translation of the word from Hamnosys notations to SiGML notations, containing characters like eye gaze, mouth gestures, head movement etc. These lists will be displayed in the 'Phrase to translate' section. See image below for more convenience.
Depending on the clicks the user has made, by pressing the plus button, so much extra information will also be available. To enable extra input information, the user will have to press the 'Check'-button again, one time to display the total extra information and another time to hide everything.
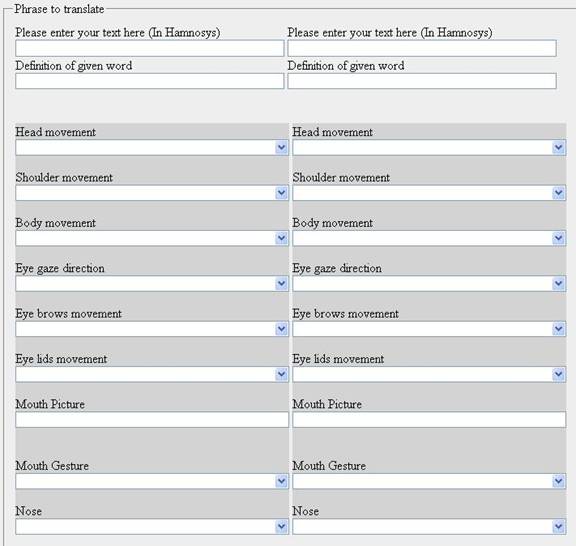
Figure 4: Non manual characters input lists
By checking the boxes the user will be able to hide a complete row of extra information. By checking the nose checkbox for instance, the complete row containing Nose will be hidden.
Below as seen on the image:
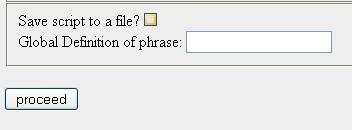
Figure 5: Save script to file option
By placing the cursor above the checkbox, the user will be informed that by checking the box the file will be saved to the server and will have the name given in the text box below. In case of a complex phrase, containing more than one word, a text box will appear as seen above, with the title 'Global Definition of phrase'. In case of a simple word translation, the name of the xml file will be saved as the name given in the field 'Definition of given word'. The text that the user will type in should be in Latin characters.
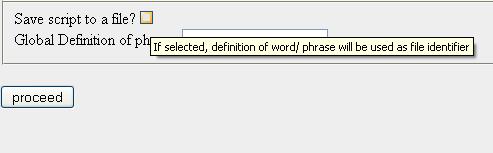
Figure 6: Save script to file user information
By pressing the 'proceed'-button, information given by the user will be send to the server. A checking before send will occur on the client side informing the user every time, what went wrong.
Working with the tool
In following section a detailed description, on how to work with the tool will occur.Translating a simple word
Let's assume that the user would like to translate the word policeman in Greek Sign Language (GSL). By giving the HamNoSys notations of the word policeman in GSL in the proper field, the user is ready to proceed to the next step.
Adding non manual characters
If it is desired, the user can add non manual characters like head movement, shoulder movement etc to the translation. To do that, the user should press the 'Show' button in the section 'Non manual characters management'. By pressing the button, the value of the button will change and will show 'Hide' to the user. At the same time a button with the value 'Check' will appear and below that a list of check box for all the non manual characters. The user will not be able to check any of these, unless the button 'Check' is pressed. By pressing the button, the value will change to 'Uncheck' and input fields in gray background will appear below the pair of input fields. See figure 4 To hide the list of check boxes a user can press the 'Hide' button. The user can choose the proper value from the lists and he/ she is ready to proceed to the next step, pressing the 'proceed' button to send the data to the server.
Automatic checking of the form
Automatic checking of the form will occur on client side. If everything is fine, the data will be sent to the server. Otherwise the user will be informed. See following image for an example:
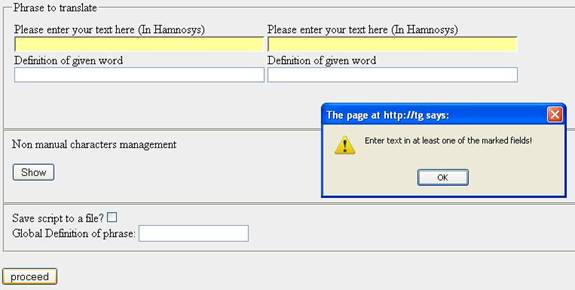
Figure 7: Automatic checking
Proceeding with the translation
If all the fields are filled as they should the next step, translation and creation of the xml script for the avatar animation, will occur. Information will be displayed to the user as follows. The definition of the word will be displayed to the user. Text in HamNoSys notations will be displayed to the user in a white background. An alternative view also in HamNoSys notations will be displayed to the user as well, in case some characters will not be displayed above correctly. Below in a gray background the recognized HamNoSys characters will be listed and just after that, the xml script will also be visible to the user. The user can then just copy the entire script and paste it to the 'SiGML Player Applet' tool. See image below:
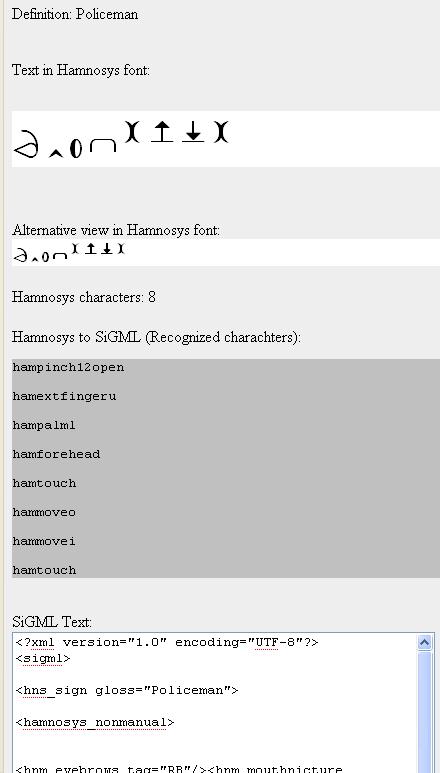
Figure 8: Translation results of the world 'Policeman'
Translating a complex word
In case of a more complex word or phrase, with a limit of 4 words, the user can work as described in following section.
Adding more input fields
A user can add more input fields by pressing the button with the plus sign on it, which is located at the upper part of the page just above the section 'Phrase to translate'. By pressing the button simultaneously another pair of input fields will appear to the user, see image below for convenience.
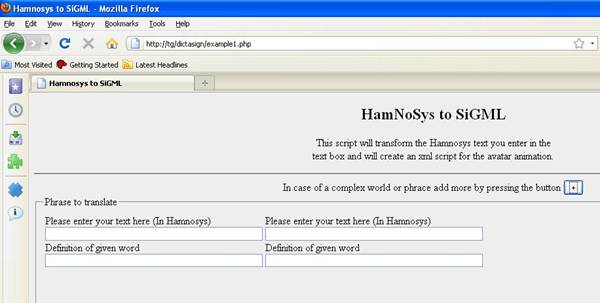
Figure 9: Adding more input fields
Adding non manual characters
As described in the section 'Translating a simple word' the user can work in the same way to add non manual characters and then proceed to the final step, the creation of the xml script.